If you are seeking a chewy gluten free pizza crust, I am sorry, this is not that recipe. This recipe creates a nice, thin, crisp gluten free pizza crust. For a chewy, holdable, foldable crust, check out my recipe for thick and chewy gluten free pizza crust instead.
All others, please continue reading, it’s worth it, I promise.
If you are looking for a thin, Crisp Gluten Free Pizza Crust that holds up to whatever toppings you throw its way, this pizza crust is for you. So good, even your gluten-eaters will love it.
When I was was first diagnosed with Celiac Disease, I tortured my family.
I didn’t mean to, and I didn’t try to, but goodness…the things that I made them eat and called it pizza…I’m embarrassed to even admit.
Thankfully, my family is very forgiving (or maybe that just shows their love for pizza, either way, I’ll take it). Many of my early ‘crusts’ were so horrible, they were inedible. They were really, really tough. So tough that you couldn’t cut through them, or eat them, for that matter.
Yeah, really kind of defeats the purpose when you eat the toppings OFF of the crust, and leave the crust.

But now, well, we can have pizza once a week, and no one complains. Everyone loves when I make pizza now, even if it is just a simple cheese pizza (which seems to be the kid’s favorite).
I have made this pizza crust over 50 times already, and have always had great success with it. My Mom makes this crust as well, and she really likes it too (thank goodness she didn’t have to have the learning curve I did, I’m not sure my Dad could tolerate those ‘crusts’ that I made when I was newly diagnosed). So, now it is time to share it with you!
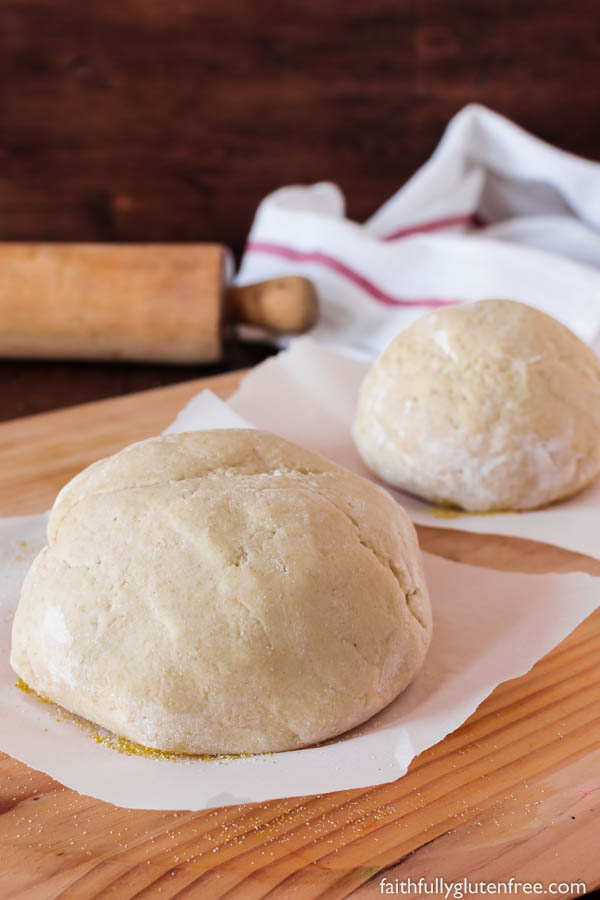
First off, throw all ideas of tossing your pizza crust dough out the window. Gluten free dough will not work that way. It just won’t. You need gluten to give your dough the ability to stretch like that, and that can’t be replicated in gluten free dough.
You can, however, roll it out.
I very lightly put some tapioca starch on the outside of the dough, you don’t need much, just a little. This will let you roll the dough out without a problem. I like to use my little pizza rolling pin, it makes it easier to roll the dough out evenly.
I roll the dough out on parchment paper, and transfer the parchment paper to my pizza baking pan. I like to use a pizza pan that has holes in it – you’ll see why in a minute.
To ensure a crispy crust, I pre-bake my crusts before putting the sauce and toppings on. Although I pre-bake it on the parchment paper, I remove the parchment paper before putting my toppings on. That way, the second time I bake it, the bottom stays nice and crisp because the holes in the pizza pan allow any extra moisture to escape.
After baking and cutting my pizza, I like to place the pizza pan on a wire cooling rack to allow steam to escape from under the pizza. Otherwise, it will start to accumulate moisture under your pizza, and your crust will not stay as crisp.
What kind of pizzas to make with this Crisp Gluten Free Pizza Crust?
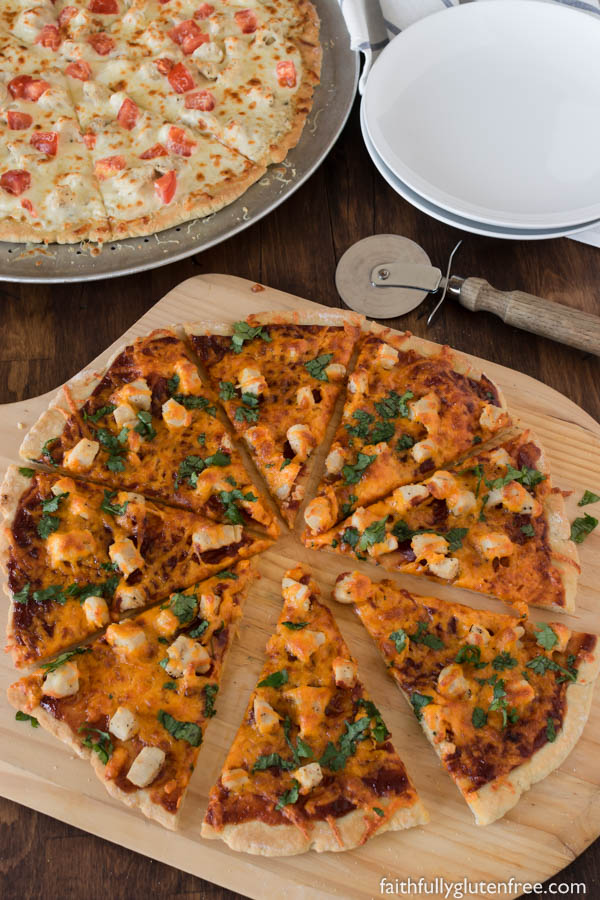
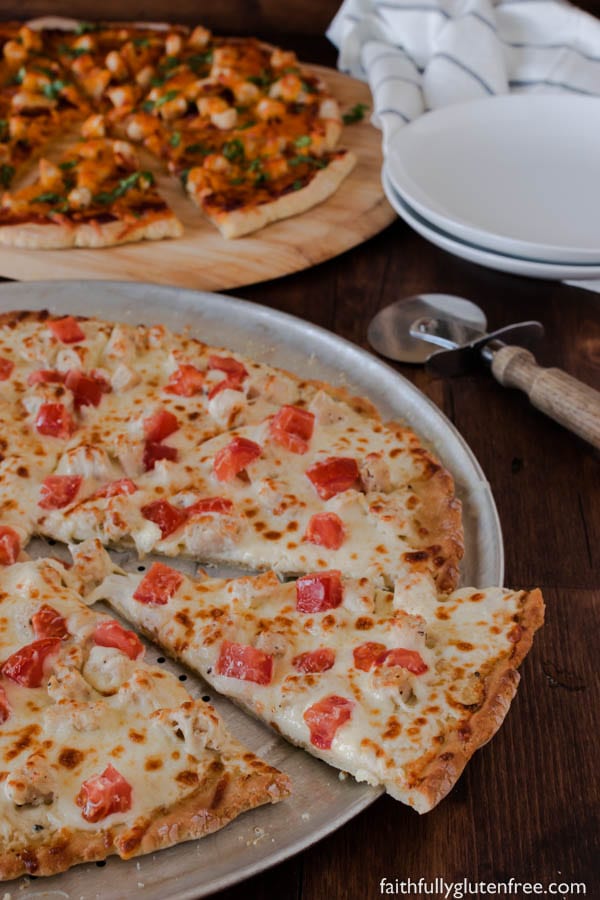
- Barbecue Chicken Pizza (the one with cheddar cheese pictured above is a BBQ Chicken pizza)
- Gourmet Chicken Pizza (the white sauced pizza pictured is a Gourmet Chicken Pizza)
- Garlic Mashed Potato Pizza
- Spinach Garlic Pizza
- Philly Cheese Steak Pizza (scroll way to the bottom for this one)
Crisp Gluten Free Pizza Crust Recipe:

Crisp Gluten Free Pizza Crust
If you are looking for a thin, Crisp Gluten Free Pizza Crust that holds up to whatever toppings you throw its way, this pizza crust is for you. So good, even your gluten-eaters will love it.
Ingredients
- 1 2/3 cup brown rice flour
- 1/2 cup potato starch
- 1/3 cup tapioca starch
- 1 1/2 teaspoons xanthan gum
- 1 tablespoon rapid-rise yeast
- 1 teaspoon salt
- 1 teaspoon granulated sugar
- 1 teaspoon Italian seasoning (optional)
- 1/2 teaspoon garlic powder (optional)
- 3 tablespoons olive oil
- 1 large egg
- 1 cup warm water (start with a few tablespoons less, add more if necessary)
Instructions
In the bowl of a stand mixer fitted with a paddle attachment, add all of the dry ingredients. Stir to combine.
With the mixer running, add the olive oil, egg and 3/4 cup water, adding up to 1/4 cup more if necessary. The dough should come together in a ball around the paddle. If it still seems too dry, add a few more tablespoons of water. You don't want the dough to be too sticky.Beat on medium speed for 2-3 minutes.
Divide the dough into two balls, forming each into a crust on a sheet of parchment paper (two 14" round pizzas). Flour your hands with tapioca starch before handling the dough, and you should be able to work with it without it being too sticky to roll out. If it is still sticky, place a sheet of plastic wrap over the top to help you roll it out.
Allow dough to rise for 30 minutes in a warm, draft free place (this gives a lighter, more crisp crust.)
Preheat oven to 425 degrees F.
Bake pizza crust in the preheated oven until lightly browned around the outside (approximately 12 minutes).
Remove from oven, slide the parchment paper out, and top the pre-baked crust with your favourite gluten free sauce and toppings.
Return to oven and bake until toppings are bubbling and cheese is starting to brown (another 10-15 minutes, depending on your toppings).
Remove from oven and cut into slices immediately. Place the pizza pan on a wire cooling rack to let steam escape from the bottom of the pizza.
Enjoy!

Recipe and images updated March 2018.


raquel @ erecipe says
I love the crust looks so crispy.
Evelyn says
oh, how I’ve missed pizza! I cannot wait to try this.:-)
Betty says
This is excellent. I only have a pizza stone but it was still a great crust. Question. How can I store the second crust. Can it be frozen raw or would you suggest prebaking before freezing?
Jeanine Friesen says
I would prebake it, cool it, and then wrap it up to freeze it. I’m pretty sure I’ve heard of others doing it that way – I’m feeding a family of 4, so that’s not the case here. 🙂
Betty says
Oj. Thank you.
Cindy says
Ummm…. Can I come over for dinner? Looks absolutely DE-LISH!!
charlotte mgcc says
Have you tried Julies gluten free recipe from MGCC, I hear it is pretty close to what the gluten crust tastes like?
Crysi says
I made this tonight for my family & inlaws. It was so easy to make & fairly easy to spread. My 4yo told me it was the best pizza ever. That’s a huge compliment coming from her. So glad I found your site. She’s the reason we’re a gf family & she’s been loving your recipes.
rwect says
I have made this 4 separate times now, each time i make it, it just gets better, i think i beat it a little longer this time, let it rest for 10mins, then baked it for 15mins on the fan forced bake setting in our oven, it came up beautifully browned, then topped and baked just like you said.
I think the most important step is putting it on the wire rack after it comes out of the oven. (I made this when we went away, and didn’t have a rack- still good, but not to full potential).
My G’ma said she thought it was a regular pizza (she’s never tried gluten free), and my husband, requests this pizza even thought he doesn’t eat gluten free.
So 10/10 from our family.
Good Job!
Sarah Barbour says
My family and I love the GF pizza crust I’ve developed, but it has a hand-tossed texture… which is great and all but I miss crispy pizza crust soooooo much!!! I cannot wait to try your recipe, it looks fabulous! 😀
Adriana says
Looks scrumptious. What toppings did you put on the top pizza? Have you ever tried a BBQ chicken? Do you just put BBQ sauce instead of pizza sauce?
Jeanine says
Thanks, Adriana! The top pizza was…I believe…olive oil brushed on the crust, then a mixture of fried up onion, garlic, spinach & chicken. Feta cheese, tomatoes & green peppers topped it off. YUM!
For the BBQ chicken recipe, check out this one: http://www.thebakingbeauties.com/2008/06/barbecue-chicken-pizza.html
Page says
Hi, just wondering if you’ve ever frozen this crust and used it later?
Page says
Nevermind saw that you haven’t…anyone else tried to freeze it?
Page says
Nevermind saw that the prebake idea and that sounds better to me. Thanks!
Star says
This pizza crust was great! Good flavor and very firm.
Jeanine says
Thanks for the review, Star, I appreciate it! Glad you’re enjoying the crust. 🙂
Cara says
This post made me smile! When I went off of gluten, I think I tortured those around me by being my guinea pigs and shoving their mouth with pizza crust that tasted just like dust and something chewy, not sure what that was… There is a pizza chain out here in Cali that makes gluten free AND vegan pizza options and it’s the best I have had! <–that's saying a lot. Your crust reminds me of theirs which means it must be awesome (said in high-pitched, singing voice) 🙂
Jeanine says
Oh my goodness, we had at least a year of horrible, horrible ‘crusts’. Glad to see I’m not the only one. lol (and funny, cause I read that in a high-pitched singing voice too). 😉
Kimber says
Which chain? I’m newly GF and live in Orange County!
Lisa @ GF Canteen says
jeanine – that looks awesome. I wonder if the crust would work without x-gum or maybe with a tiny bit of guar gum? I hate that I cannot have x-gum cause it would be so much easier! I love the way it bakes up crispy (I love thin crust) and holds up the toppings! I want some. now! I’m going to try it soon and will let you know what happens without the gums. That pizza looks so very good and it is still breakfast time here!
Jeanine says
Hey Lisa! Since it’s not overly ‘bready’, I wonder if a little guar gum would still do the trick. I find that with bready things is when I have to up the xanthan. Let me know how it works for you, as I’m sure there are others wondering the same thing. 🙂
Esther says
Hmm, I cannot have xanthan gum either but I thought I read somewhere that you use arrowroot instead.
Jeanine says
I haven’t heard of that, sorry. I know some use a “Pixie Dust” – http://www.drjeanlayton.com/2014/12/pixie-dust-whole-food-xanthan-gum.html
Lyndsay from CHARMED says
Jeanine, this recipe looks absolutely beautiful. I like my pizza crust thin and crispy. I’m sending this link to a friend of mine who has just began eating gluten free. Thanks for another amazing recipe!
Tammy Wakley says
Jeanine,
We tried this recipe last week and I fell IN LOVE! My husband and boys loved it too! I like it so much I made it again a few days ago, just as cheesy bread to have with GF Spaghetti. And….then tonight I used it to make pita’s for chicken gyro’s. I just spread it in little 4″ circles instead of the large one. It worked beautifully! I may never eat another G-Free bread again. Thank you for sharing!!
Jeanine says
Yeah!! that is so great to hear, Tammy! I’ve never tried making it into pitas, but I will now. 🙂
Tammy Wakley says
I also like to use fresh grated garlic in place of the powder. It adds an extra little zing, and seems to add some moisture. But, we are kinda garlic nuts here.=)
Jools says
Oh my, dear Jeanine, where have you been all my glutenfree baking years? This is the second recipe I tried after being completely blown away by those AMAZING cinnamon buns (within three weeks a firm favourite of my coeliac daughter, the rest of my non-coeliac family, friends and neighbours, they beg me for it, can you imagine?)
And again this is a winner! I got the exact pizzacrust you promised: thin, light, crispy, tastefull and indeed holding it’s shape. And very important: super easy to make! And mind you, my rapid-rise yeast was rather old, still got this beautiful result. I used Doves Farm Gluten Free White Bread Flour which combines more or less the first two ingredients and which is easily obtainable over here. If you’re ever in need of a European testpanel, please let me be in it! For the time being I will definitely keep on checking your blog and frantically be repinning your recipes. Thanks sooo much!!!
Jeanine says
Woohoo!!! So happy to hear that, Jools! Glad that the recipes are working for you with the flour change you are having to do too. Are individual gluten-free flours not available there? I’ve heard of the Doves Farm GF Flour, seems to be a popular one over there.
Thanks for the support, I appreciate it! 🙂
Deborah says
I made this a week ago for the first time. I was a bit skeptical after trying several other pizza crust recipes that were a big failure. Not this time. All of my family loved it, and my pickiest eater told me it was the best pizza I have ever made! That is saying a lot since I was an avid pizza maker before eliminating gluten from our diets. I am very thankful for wonderful people like you who share their talents with others to benefit from.
cheryl weeden says
can’t wait to try these. my husband and I are new to the gluten-free world and has been a challenge finding good tasting recipes. thanks
Sue says
A very nice gf pizza crust……my husband, who is not gf gave a ‘thumbs-up’, too…..he went back for seconds!
Jeanine says
Glad to hear that, Sue! My family isn’t GF (Just me), and they all go back for seconds & thirds too. 😉
Tracy says
This is the best gluten free pizza crust I have tried! I tried gluten free bisquick and it did not taste like pizza crust. I purchased a pizza. I also purchased a pizza stone. This came out crispy and yeasty.
I actually got a “This is good.” instead of “It’s okay from my hubby.
I will be using this crust for our weekly pizza meal from now on.
Thank you,
Tracy
Jill Anderson says
I only want to make one pizza. Can I freeze half of the dough for another time? I would thaw it and then let it rise, and then cook it…..
Jeanine Friesen says
I haven’t tried freezing the dough, but, you can form it into a crust, partially bake it for 10 minutes, let it cool, wrap it, and the next time you want pizza, just take it from the freezer, top it, and bake it at 425*C until bubbly. 🙂 (but I ‘think’ freezing the dough would work too)
Steph says
I made this last night for our weekly pizza night, and for the last 3 years our pizza night has been interesting because i keep trying new pizza crusts. I have found a couple that have been ok but this one has been the best by far! The only think I did wrong was… I used the dough hook in my stand mixer instead of the whisk attachment and it didn’t mix extremely well so the dough was a little lumpy. But I was able to flatten it out and it still tasted really good. Next time i’ll know to change the attachment. Thanks again!!
Claudia says
OMG, I made this last night, and we LOVED it!!!
I can’t have potatoes or rice, since I have a food sensitivity to both. So, I used my homemade gluten free All-Purpose flour mix. I left the batter on the loose side, since you said to make it like a thick cake batter, let it rise for 30 minutes, and it worked like a charm. The edges were crispy and the center crisp, but a bit soft/bread-like in the center, which was perfect.
I put a piece of wide parchment paper over my cookie pan (with sides), and baked it until it was just starting to turn golden around the edges. Then, I took it out of the oven, and allowed it to cool, for about ten minutes, so I could peel the paper off. I like to oil my pizza crust with olive oil, so poured a couple tablespoons into the cookie sheet, and on top of the crust, brushing to spread evenly. A sprinkle of garlic powder (top and bottom), and back into the oven for about 5 minutes, to brown it, and allow the olive oil to crisp it a bit.
I have a recipe program, that give calories, carbs, protein, etc. so I put this recipe in the program. With 8 servings, it told me each serving has:
Calories: 334 grams
Carbohydrates: 54 grams
Fat: 10 grams
Protein: 4 grams
Sodium: 241 grams
Of course, what you choose to put on top, needs to be included in the final numbers, for each piece of pizza. We went whole hog (with organic/uncured bacon and organic sweet Italian sausage, and three different organic cheeses), so the count was up a bit, but even so, one serving was 527 calories, and since that was all I ate, it was still within my calorie limits for the day. For me, protein intake is important, and my pizza has19 grams of protein, so I can’t complain.
I have been gluten free for about five years, and never tried pizza dough, because I didn’t think I would get a satisfactory crust. My husband kept saying, “This is SOOO good!”, the whole time he was eating it. So, in our house, this is a winner! Thanks for all your hard work, perfecting a gluten free pizza crust!!! 😀
Jeanine Friesen says
Oh, Claudia, you have me wishing it was pizza night TONIGHT! Your pizza sounds awesome, and I’m so glad that everyone gave it the thumbs up! Yeah!
Beverly says
I need to figure out what flour to use in place of rice to do your recipes. I think millet flour will work. I use a lot of Bob’s Red Mill All Purpose flour too. I don’t think it will work for some of your recipes.
I have allergies to rice, soy, hemp, oats, flax, and wheat. I think I left something out.
I don’t do canola or vegetable oil either. I have allergies to both.
If you have suggestions for me, please let me know. I love your recipes, but some of the ingredients will make me deathly sick and i will loose my vision too.
I rate the idea of this recipe as a five as a result.
Thank you.
Beverly Kendrick
Karen says
Jeanie, your recipes are the best! My daughter is gluten intolerant and we keep looking for her favorite foods that don’t “taste” gluten free. This dough recipe is so much tastier than boxed, easy to make and easy to spread out.
DD pre-baked about 10 minutes, cooled and wrapped. We baked it the next day with all the usual pizza toppings. It was delicious and crisp.
This recipe is another keeper!! So glad we found your site. 🙂
Jeanine Friesen says
Perfect, Karen! When I’m planning ahead (or remember to play ahead) that is what I like to do too, nothing beats crusts that are ready to use! 🙂 The dough makes you wonder how it will work, but once it’s baked up, it’s as good as wheat. 😀
Ronalyn Hurley says
Jeanine, I used your pizza crust recipe, including the Italian seasoning and garlic powder, last night and it was fantastic. I replaced the water with sparkling mineral water and also let it rise, as you suggested. Thank you for sharing.
Jeanine says
So glad to hear that, Ronalyn! Pizza night has returned! 🙂
Stephanie says
Hiya, im 17 from the UK and just tried out this recipe! I’ve been diagnosed with coeliac disease since I was very young and have always struggled to find a light, crispy, thin pizza dough. They have always turned out stodgy and thick – Not ideal! This recipe was far better than any other pizza recipe I’ve tried before and even better than the ones they sell in Tesco’s! Thankyou very much for posting this, my family and I thoroughly enjoyed it! I’ll definitely be using this recipe again and be checking out your others!
Michelle Cooper says
Hi Jeanine, I know this is one of your older recipes, but I just discovered it so it’s new to me. I have made so many gf pizza crusts and we are always disappointed. This one is AMAZING. I have made it several times now, and my kids and husband are so happy with it. It’s just wonderful!!! I never have to use over the 1.25 cups of water and it’s SO easy and quick… it kind of blows my mind. It’s easier than gluten crust. THANK YOU for publishing! I’m so glad I stumbled across it!! I will try some more recipes from your blog… 🙂 Thanks again!
Michelle
Jeanine says
You’re so welcome, Michelle! My family & I ate a LOT of really, really bad pizza crusts before I came up with this one. I’m glad to hear that it’s a winner with your family too! Woohoo for pizza night! 🙂
Deb says
I was curious if anyone has tried this recipe in a bread maker? Is it too thin for that?
Jeanine says
Good question, Deb! I’m not sure! I know it is a very soft bread. I don’t have a bread machine, so I’ve never played with it.
Lise says
I made this last evening. I nearly wept because it was the first time I had made pizza in years that actually tasted like pizza and the old crust I used to make. Oddly enough it is my old wheat crust recipe, with the modifications of GF flour of course , xanthan gum and an egg.. I had tried it all before never adding the egg.. What a joy it was to sit and enjoy this pizza.
Vanessa says
Love!!! I was picky before I went gluten free a little over a year ago and most of my “go to foods” including pizza had to go. They first 6 months I had more salads and white rice than I could stand so I started to venture out and make my own foods, some good and some not so good but this has become one of my favorite recipes to whip up and even my sister who thinks gluten free means nasty loves this.
I seen the comments about freezing the crust after baking and then topping and baking again but has anyone tried to top before you freeze?
Jeanine says
So glad to hear that, Vanessa! I went through a LOT Of nasty pizza crusts coming up with the two recipes that I have on my site (one is for a chewier crust, this one is a crispier crust). I haven’t tried topping the pizza before freezing it, but I guess as long as your toppings freeze well, it should work. If you try it, please report back! 🙂
Sandi says
Excellent! Finally pizza dough that has real crunch and crisp–even when reheated. How I wish I had found your site years ago when half my family went GF (and corn-free, soy-free, and dairy-free). Instead I spent hundreds of dollars on GF cookbooks, recipes, and ingredients trying to produce food that was palatable–especially bread. Your bread recipes actually produce breads that have the feel of read bread in the mouth instead of the all-too-familiar-wet-pop-over feel. Thank you! Thank you! Now when my GF family comes for visits, I can serve them food that is tasty with excellent texture, and I can highly recommend your site to others on the GF track.
Jeanine says
Yeah!! So happy to read this, Sandi. You have no idea how many BAD pizza crusts my family went through in the first few years. I feel your pain! lol Thank you so much for sharing, I appreciate it!
Pam says
Thank you thank you! I tried this for the first time tonight! I have been making “edible” gluten free pizzas for my 9 year old for the last year using a variety of store bought mixes. Tonight he finally got a pizza that was as good as the pizza I made for the rest of us. In fact, we all ate some of his also, and my pickier 12 year old (who probably should be gluten free but refuses) said “I think this as close to regular pizza crust as you are ever going to get.” That is a big compliment coming from him. Next time I think I will just make gluten free for all of us. Thanks!
Jeanine says
Yeah!!! Love that, Pam! I only make gluten-free pizza now, and my 3 gluten eaters have no complaints. 🙂 Plus, we can make a variety of toppings, and all share without the fear of cross contamination. So glad that it got the thumbs up! Woohoo!
Kristy says
I made this yesterday. With Orgran brand SR gluten free flour blend. It was ok, a bit thick when I made 2 pizzas from the one batch, next time I think i’ll make 3 pizzas and roll them thinner. or try the plain blend. It didn’t feel like it was cooked through properly, and I prefer a thinner base. But, it’s hopeful. It’s much better than the pre-bought bases I’ve made, and the price is alot more reasonable. It was so quick to make with the Kenwood mixer.
I’ll definitely be playing with this recipe until I get the right mix. I was surprised it rolled pretty well with the rolling pin when I added a bit more of the flour so it didn’t stick. I’ve frozen one of the bases, so I’ll report back with how it froze. I rolled it out, and wrapped it in plastic and froze it on the pizza tray to keep it flat and to stop it from breaking in the freezer.
Jeanine says
I’ve never heard of that flour blend, Kristy.That could make all the difference too – because as written, the dough is too sticky to roll out. You can decrease the amount of liquid to make it roll out, and that does work, but the flour blend may be throwing you off there.
Pam says
I just made a double batch of this and accidentally threw in 3 cups of water without thinking…it is definitely a thinner dough than I made before…do you think it will still be ok?
Richard Ferris says
Can the pizza be baked on a pizza stone? Also have you made frozen this dough before and if so did it come out okay?
Jeanine says
Hi Richard. I usually spread the dough (it’s too soft to roll without using water to keep it from sticking) on parchment paper on a baking stone, then after parbaking it, I will remove the parchment and bake it directly on the stone. Works great on the BBQ like that too! I’ve frozen the par-baked thick pizza crusts before, but haven’t tried the thin crust. I would think it would work just fine though.
Richard Ferris says
Thanks for your quick response!
Eliza says
How come it says 2 and a half cups total of flour, but then in the note it says to use 4C rice flour as well as others?? Confused and hungry lol x
Dick L. says
The note is the recipe for the flour blend. It makes 6 cups of the blend. You only use 2.5 cups out of the six for the recipe; save the rest for another project.
Kerem demir çelik says
Thank you thank you!
Mariana says
I just made the pizza and it was wonderful.
Very tasty,easy to make .
Loved it.
Thank you so much.
Mariana
Jeanine says
Thanks for sharing, Mariana! Glad to hear it was a hit. 🙂
DebS says
Amazing gluten free pizza! This is the best one I’ve had since going gf and really missed a good thin crust pizza. Even my very picky husband loved it! I will be making this again and again. I did not have instant yeast, so used active yeast and proofed in the warm water and sugar. Very simple and added it to the mix. I’ve gone out and purchased instant yeast so will use that next time. Great recipe! Thank you!!!
Jeanine says
You are very welcome, Deb! It’s great to enjoy GOOD pizza again, isn’t it? 🙂
Lisa Carrillo says
Can I use all Purpose 1:1 flour in place of the different flours?
Siobhan says
Hi witch pizza do you think is the best.
Thanks.
Jeanine Friesen says
It all depends on your preference. For my family, I usually use the thick and chewy crust.
Paula says
Hi Jeanine
We love this recipe. When I make the crust I pre bake both pizza’s but only use one for our dinner the same night. The one I save I cover and put in the refrigerator overnight. The pre baked crust does all kinds of interesting things ie it curls up and waves a bit.
Can you take the raw dough after it has risen and wrap and refrigerate overnight. Roll out the next day and make your pizza? Just tired of dealing with the uneven formation the next day. Thanks for your help. Paula
Jeanine Friesen says
That’s a good question, Paula. I’ve heard of people baking the crust ahead of time, and freezing them to pull out at the last minute, but since you’re wanting to use it one day after the other, I think I would just put the dough, formed into a “ball” into a greased air-tight container and refrigerate it until the next day. Take it out about 30-60 minutes before you want to roll it out so it warms up to room temp, and then work with it. I have 2 teens, we never have the issue of only needing one pizza. 😉